Watch
Hardwood Floor Cupping in Florida: Causes and How to Fix It
Why Hardwood Floors Cup in Florida
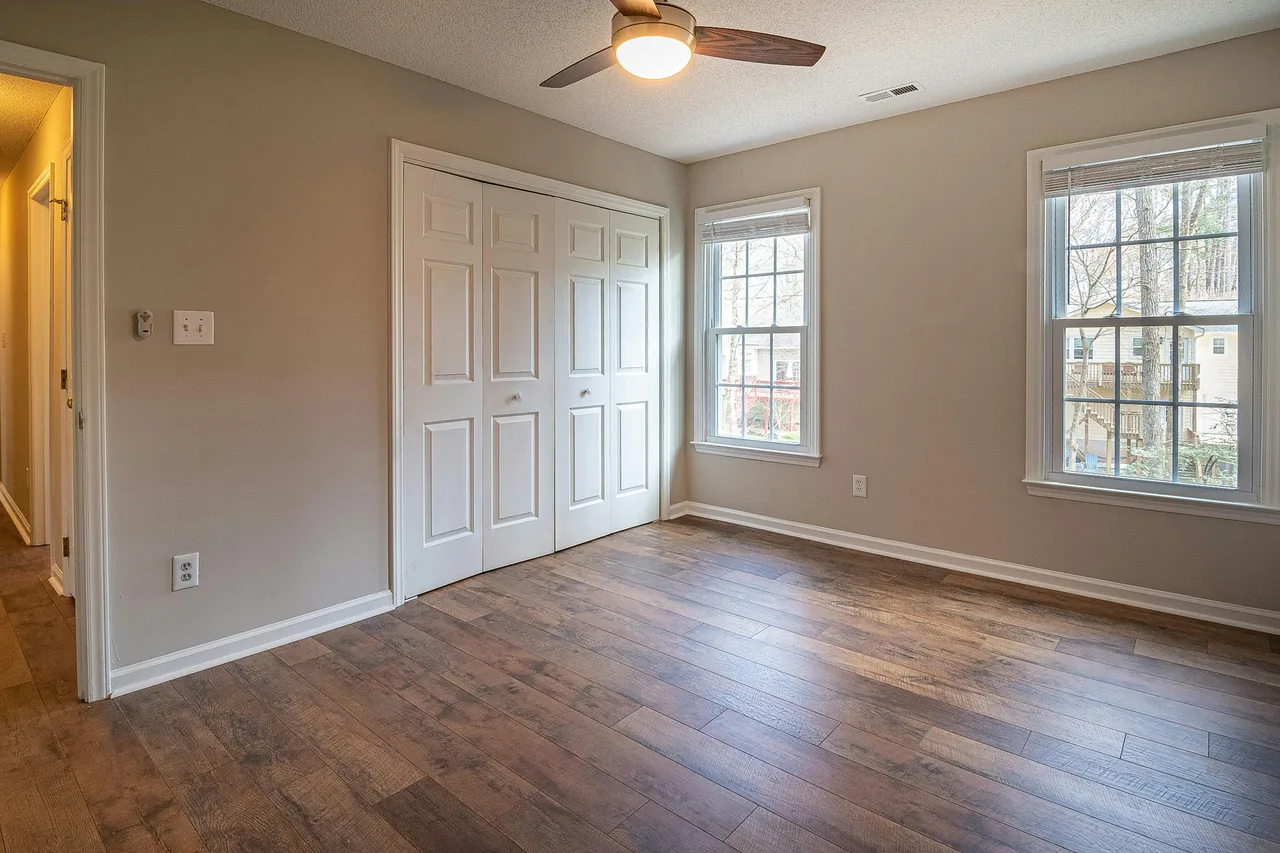
Cupping happens when the underside of a board carries more moisture than its top face. Cupping is a moisture gradient across the thickness of the wood: the wetter bottom swells while the drier top stays put, so each board’s edges lift higher than its center and the floor takes on a washboard feel. It is a symptom of where moisture is coming from — never a flaw in the stain or topcoat.
Wood is hygroscopic, meaning it gains and loses water vapor until it balances with the air and substrate around it. That balance point is its equilibrium moisture content (EMC). When one face sits against a wetter environment than the other, the two faces chase different equilibria, the wood swells unevenly, and the board cups toward the drier side.
In a Florida home, the wetter side is almost always the bottom, for two reasons that compound each other. First, slab-on-grade construction puts the floor over concrete in direct contact with damp soil, and that slab drives moisture vapor upward year-round. Second, indoor RH can sit above the wood’s comfortable range through a humid summer, especially when the air conditioning is undersized, oversized and short-cycling, or simply off in a part-time or rental property. Add a plumbing leak, a clogged AC condensate line, or a dishwasher seep and the gradient steepens fast.
Four moisture sources cause nearly every cupped floor in this state. Working through them in order is how the cause gets pinned down before a sander ever comes out.
- 1
Slab vapor drive
The silent, year-round culprit. A slab-on-grade floor wicks soil moisture and pushes it up as vapor, soaking the underside of a wood floor that looks dry on top. This is the source most often missed because nothing leaked.
- 2
Indoor humidity above the wood’s range
When interior RH sits above 50% through a Florida summer, the top of the wood gains moisture and the board moves. An undersized, oversized short-cycling, or switched-off air conditioner is usually behind it.
- 3
A point-source leak
A clogged AC-condensate line, a slow supply-line drip, a dishwasher or icemaker seep, or a refrigerator line localizes the cupping to one area. The pattern — worst near an appliance or wall — points to the source.
- 4
Wood installed at the wrong moisture content
A floor laid too dry for the home swells and cups in its first humid season. This is an acclimation failure baked in at install — the moisture content never matched the in-service home to begin with.
The shape of the deformation also tells a story. Edges higher than center — cupping — means the bottom is wetter than the top, the classic Florida pattern. The reverse, center higher than edges, is crowning, and in this climate it is usually man-made: a cupped floor that was sanded flat before it dried, then dried later and dropped its edges. Reading which way the board bows points straight at the cause.
Reading the deformation against its likely Florida source turns a vague "my floor looks bad" into a diagnosis. The table below is the field triage we run before touching a cupped floor.
| Symptom | Board shape | Moisture story | Typical Florida source |
|---|---|---|---|
| Cupping | Edges higher than center | Underside wetter than top | Slab vapor drive; summer RH above 50%; condensate or plumbing leak |
| Crowning | Center higher than edges | Cupped board sanded flat, then dried | Premature sanding before EMC is reached |
| Gapping | Boards pull apart | Wood drier than at install | Over-dry winter HVAC; wood laid too wet |
Each shape is a moisture story told backward: read the deformation, infer the gradient, then chase the water. That triage is what keeps the next four sections in the right order — source, climate, diagnosis, recovery.
The Slab, Vapor Drive, and the Barrier
The most common Florida cupping source you cannot see is the concrete itself. Slab-on-grade construction sits the floor assembly on a slab in contact with moist soil, and water moves upward through it as vapor — a process called vapor drive. A wood floor glued or nailed over that slab feels the vapor on its underside long after the surface looks dry.
What the code requires under the slab
Florida construction guards against this with a sub-slab vapor retarder. The FBC Residential code, section R506.2.3, calls for a 6-mil (0.006 in) polyethylene vapor retarder, with joints lapped not less than 6 inches, placed between the base course or subgrade and the slab at conditioned areas. When that membrane is missing, torn during the pour, or the home predates the requirement, the slab passes far more vapor than a wood floor can tolerate, and the underside stays chronically wet.
Where the barrier fails in older Florida homes
Plenty of Florida housing stock went down before the retarder was routinely inspected, and on remodels the original membrane is often punctured by post-pour plumbing or saw cuts. A slab that once tested dry can start driving vapor after a grade change, a failed gutter, or an irrigation head re-pointed at the foundation raises the water table beneath it.
Confirming the slab with a real measurement
Confirming the source is a measurement, not a guess. In-slab relative humidity should be checked per ASTM F2170 using probes set at 40% of the slab depth, with 75% RH a common acceptance ceiling for wood and resilient floors; the moisture-vapor emission rate can be cross-checked with ASTM F1869 calcium-chloride testing. Our slab prep guide walks both procedures, and a failed slab reading explains most cupped floors that "had no leak."
Before blaming the slab, rule out the leaks that imitate vapor drive, because the fix is entirely different:
- AC-condensate line. A clogged or disconnected drain line wets the floor under or downstream of the air handler — the single most common point source in Florida.
- Supply and waste plumbing. A weeping shutoff, ice-maker line, or dishwasher fitting tracks water along the subfloor before it shows at the surface.
- Exterior water entry. Wind-driven rain past a failed threshold or a slab below grade after landscaping changes mimics whole-room vapor drive.
If every one of those reads dry and the slab still tests high, vapor drive is the verdict and the cure is a moisture-control assembly on the next install, not a sander.
The Humidity Level That Prevents Cupping
Hold the interior between 30% and 50% relative humidity at 60-80°F. That is the in-service range the NWFA publishes for wood floors, and it is the band that keeps solid wood near its 6-9% equilibrium moisture content. Let indoor RH climb and stay above it through a Florida summer and the top of the wood gains moisture; pair that with a wet slab below and the board cups.
The practical working target most flooring professionals aim for is the middle of that band — roughly the mid-40s percent — because a floor centered there has room to swing in both directions across a Florida year without crossing out of range. A home parked at the high edge has nowhere to go when the wet season arrives.
Why air conditioning alone often misses the band
Reaching it is an HVAC question as much as a thermostat one. Air conditioning dehumidifies only while it runs; an oversized unit cools the air fast, short-cycles, and leaves humidity behind. Whole-home or standalone dehumidification, correct AC sizing, and never letting a part-time property sit closed and un-conditioned through August are what actually hold the band. The same discipline that prevents cupping is what protects an engineered wood floor and every other moisture-sensitive finish in the house.
Log the room, do not guess it
A simple data-logging hygrometer in the room removes the guesswork. Tracking RH and temperature over a full Florida year exposes the August spike that no single spot-check would catch, and it gives a homeowner the evidence to size dehumidification correctly rather than reacting after a floor has already cupped.
Diagnose the Cup Before You Fix It
Before any repair decision, pin down two things: where the moisture is entering and how far the wood has actually moved. A cupped floor is evidence, and the diagnosis is a short, repeatable sequence any Florida homeowner or pro can follow with a moisture meter and a hygrometer.
The two-meter method
Cupping diagnosis rests on comparing readings, not on a single number. A moisture meter reads the wood; a hygrometer reads the room; together they reveal whether the gradient is being fed from below, from the air, or from a leak.
Reading the wood against the room
- Meter the boards in several spots. Set the meter to the wood species and map readings across the cupped area and a stable area — a spread between them confirms an active gradient.
- Log room RH and temperature. Place a data-logging hygrometer in the affected room and compare against the 30-50% band over days, not minutes.
- Test the slab if readings stay high. Run ASTM F2170 in-slab RH probes where the wood meters wet but the room sits in range — that pattern points down, to the slab.
When the wood reads high, the room reads in range, and the slab tests above its ceiling, the gradient is coming from vapor drive; when the room itself runs humid, the climate is the lever to pull first.
Severity and the permanent-damage line
Measuring severity decides whether the floor is a candidate for recovery or for replacement. Light, recent cupping that meters only slightly above a stable area usually relaxes; deep cupping with splits, finish cracks, or boards that have crushed against each other has likely taken a permanent compression set and will need board-level work rather than drying alone.
Will a Cupped Floor Flatten Back Out
Often, yes — if you correct the moisture source and let the wood return to a uniform equilibrium, mild to moderate cupping frequently relaxes on its own as the underside dries to match the top. The board that swelled across its width gives that width back as it dries, and the edges settle. The key is patience: re-equalizing solid wood after a moisture event takes weeks, not days.
How far it recovers depends on how long the gradient lasted and how severe it was. Brief, recent cupping from a single humid spell tends to flatten almost completely once the room is back in range. Cupping that ran for months can leave permanent compression: when wet wood swells but is restrained by its neighbors, the fibers crush against each other (called compression set), and those edges never fully return even after drying. That residual is what a sand-and-refinish later removes.
What decides how much it recovers
The deciding move is a moisture meter, not the eye. Read the boards over time with the meter set to the species; the floor is ready to evaluate only when the readings stop drifting and sit back in the 6-9% range. A floor that still reads high is still moving, and any cosmetic work done now will be undone by the wood. Where boards are split, badly compressed, or sitting over a subfloor that has failed, the answer is targeted floor repair or subfloor repair rather than refinishing alone.
Dry it slowly or split it
One caution unique to drying a cupped floor: do it gradually. Aiming a heater or a battery of fans at wet wood to speed things along dries the surface far faster than the core and can crack the finish or split the boards. Letting the room hold the target range and the wood release moisture on its own timeline is what preserves the floor through recovery.
When to Sand and Refinish a Cupped Floor
Sand only after three conditions are met: the moisture source is fixed, the wood has dried back to a stable equilibrium, and the floor has flattened as far as it will. Sanding a still-cupped, still-wet floor is the single most expensive mistake in this whole repair, because it sets up crowning. Get the sequence right and one sanding does it; get it wrong and you pay twice.
Here is why timing is everything. If a cupped board is sanded flat while its edges are still raised and wet, the sander removes wood from those high edges. When the board finally dries and gives back the swell, the now-thinner edges drop below the center — a crown. The floor that looked fixed for one season reveals a new, opposite defect that only another full sanding can correct. The order of operations is non-negotiable.
- Step1
Find and stop the moisture source
Test the slab with ASTM F2170, check for plumbing and AC-condensate leaks, and confirm the indoor climate. Nothing else proceeds until the water stops, because cupping cannot be fixed while the source is active.
- Step2
Stabilize the room and dry the wood
Bring the interior to 30-50% RH and 60-80°F and keep it there. Run dehumidification if the AC alone cannot hold the band. The wood will begin releasing the moisture that caused the cup.
- Step3
Meter until the readings stop moving
Read the boards with a moisture meter set to the species over successive weeks. Equilibrium is reached when consecutive readings no longer drift and sit in the 6-9% range — the calendar does not decide this, the meter does.
- Step4
Sand flat, then refinish
With the floor dry and as flat as it will get, sand level and apply the new finish. Done in this order, the surface stays flat because the wood has nowhere left to move. This is the floor refinishing we perform once the moisture file is closed.
The same logic protects the warranty on any hardwood floor we are called to assess: a written moisture log proves the source was corrected and the wood was stable before a single pass of the sander. For the climate context behind every Florida wood-floor decision, the flooring hub is where to start.
Free In-Home Estimate
Floor cupping and not sure why?
A Pro Work Flooring project director meters the boards and the slab on site, finds the moisture source, and sends a written plan with the estimate.
Frequently Asked Questions
Why are my hardwood floors cupping in Florida?
What humidity level prevents wood floor cupping?
Does a missing slab vapor barrier cause cupping?
Can cupped wood floors flatten back out?
When should you sand and refinish a cupped floor?
What is the difference between cupping and crowning in a wood floor?
References & Sources
- NWFA — Relative Humidity & Wood (recommended 30-50% RH, 60-80F living conditions). https://nwfa.org/technical-guidelines/
- NWFA Technical Publication — Problems, Causes and Cures (cupping and crowning). https://nwfa.org/technical-guidelines/
- Florida Building Code, Residential R506.2.3 — Vapor retarder under concrete slab on grade. https://floridabuilding.org/
- ASTM F2170 — Determining Relative Humidity in Concrete Floor Slabs Using in situ Probes. https://www.astm.org/f2170-23a.html
- ASTM F1869 — Measuring Moisture Vapor Emission Rate of Concrete Subfloor Using Anhydrous Calcium Chloride. https://www.astm.org/f1869-23.html